If you want to run a command or a php program on a specified time interval like once a day or once a week, you can setup cron jobs in this interface. Cron jobs allow you to run a specific command or program automatically. This is often required, if you are using a software like CRM or Billing Software. Setting up cron jobs more often may degrade your server’s performance.
Setup Cron Job
To add a new cron job, follow these steps −
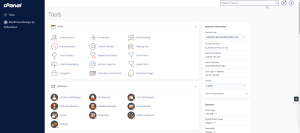
Step 1 − Open Cron Jobs by clicking Cron Jobs found in the Advanced section in cPanel.

Step 2 − Scroll down to see Add New Cron Job interface.

Step 3 − You can choose an existing setting from common settings. If you do that all the fields of cron execution time will automatically get filled. Or you can choose your custom runtime settings by specifying in the next text inputs accordingly.
Step 4 − Enter your command to run in cron job. If you are running a php file, enter full name of php file. For example −
php /home/trusetdhosting/public_html/cron.php
Step 5 − Click Add New Cron Job button to add a cron job.
Cron Email
cPanel by default sends an email each time a cron job runs. It also redirects the output of the command or file into the email. Default email for this is your system account, but you can change this email too. To change the email on which you want to receive cron email, firstly find out Cron Email interface in Cron Jobs. Then enter your new email in which you wish to get cron emails. Click Update email to update your email.

If your cron runs more frequently, then you may not want to receive emails, you can disable receiving emails by redirecting your output into null by writing >/dev/null 2>&1 at the end of the command. For example −
php /home/trusetdhosting/public_html/cron.php >/dev/null 2>&1
Edit or Delete Existing Cron Jobs
To edit or delete your existing cron jobs, you can scroll below on the Corn Jobs interface to see current cron jobs. Once you select the job, you can click either the delete link or the edit link to edit or delete a particular cron job.


